Foggy Highland Photos for Instagram: Essential Tips
Fog veils the Highlands, turning lochs into mirrors and paths into whispers. If you want to master foggy highland photos for Instagram, you need a plan that blends reliable gear, deliberate setup, and thoughtful framing. RainyRoutes speaks to rain-soaked adventures and mist-draped landscapes, and 2026 brings the Mystic Outlands look and darecations that reward bold composition. In this Part 1 guide, we focus on gear, setup, and framing that work specifically in heavy drizzle and fog. By leaning on field-tested practices, you’ll craft images that feel immersive, atmospheric, and ready to captivate your audience who crave moody travel stories.
Master foggy highland photos for Instagram: Gear, Setup, and Framing
In this Part 1 you’ll learn what to bring, how to set up quickly in damp weather, and how to frame scenes that make the fog work for you. The goal is images with depth, texture, and a palpable sense of place—perfect for Instagram grids that celebrate rain-soaked escapades.
Gear essentials for foggy highland photos: cameras, lenses, and weather protection
First, choose a weather-sealed body or a camera with solid sealing and good high-ISO performance. Fog often means low light, so a sensor that handles noise and dynamic range matters. For lenses, a versatile zoom (24-105mm or 24-70mm) covers wide moody landscapes and tighter village scenes without swapping gear in drizzle. A fast prime (35mm or 50mm) helps when light drops and shapes appear in silhouette. For extreme fog, consider a wide-angle 16-35mm to frame sweeping skies, and a telephoto in the 70-200mm range to isolate misty textures.
Protect your kit: rain covers, plastic bags, and weather-sealed bags. A microfiber cloth is essential for wiping condensation from filters and viewfinders. A compact teleconverter? Maybe not necessary in fog; skip heavy add-ons that slow you down. A sturdy, reliable tripod and a remote shutter release reduce camera shake on damp mornings. If you shoot handheld, use image stabilization and brace against a rock or tree. And don’t forget spare batteries; cold, damp air drains them faster.
- Weather-sealed body and lenses with good high-ISO performance
- Versatile zoom (24–70mm or 24–105mm) for flexible framing
- Fast prime options (35mm, 50mm) for low-light silhouettes
- Rain protection (rain cover, camera sleeve, sealed bag)
- Sturdy tripod and remote shutter
- Spare batteries and moisture-absorbing packs
For additional technique, consult trusted tutorials such as Cambridge in Colour tutorials on weather-friendly shooting and color handling.
Camera bodies and lenses for foggy highland photos
When you’re chasing fog, gear reliability matters more than the latest sensor lab results. Pick a body with robust weather sealing, good autofocus in contrasty fog, and a comfortable grip that doesn’t slip on misty cliffs. Pair it with lenses that stay sharp at slower shutter speeds and resist fogging. A standard zoom, a mid-zoom, and a versatile wide lens form a compact trio that covers most Highlands scenes. If you shoot at dawn or dusk, you’ll appreciate faster apertures and stable focus in low light.
Tips: keep your lens hood on to cut stray raindrops; avoid pushing the aperture too wide in dense fog, which can flatten textures. Use manual focus or focus peaking when autofocus hunts in milky air. And always check for condensation on the front element before you take the shot.
Tripods, stabilization, and fog-ready accessories
Fog makes wind and spray sneaky. A sturdy tripod with wide feet and a center column that can be lowered for stability is invaluable. If you’re traveling light, a compact travel tripod balances weight and reach. A remote shutter or intervalometer let you shoot long exposures without touching the camera, reducing blur from breeze. Consider a small wind shield for your tripod head if gusts are persistent. In drizzle, minimize gear changes; pre-set some compositions and settle on a couple of framing ideas.
Accessory ideas: a lens hood to keep raindrops off the front element, a microfiber cloth, a sensor cleaning pen, and moisture-absorbing packets in your camera bag. The fewer interruptions, the more consistent your foggy highland photos will look on your Instagram feed.
Weather protection and safety for your kit
Waterproof bags and rain sleeves are not optional in wet weather. Use a weather-sealed bag to keep gear dry during transit, and carry a packable rain cover for sudden downpours. Keep batteries warm in inner pockets; condensation on metal can transfer to the grip. At the same time, watch your footing near slick rocks and streams. Always tell someone your route and have a plan for retreat if fog thickens to zero visibility.
Framing foggy highland photos: composition in mist
Fog is not merely a backdrop; it is a texture that adds mystery and depth. Start with a strong foreground element—a fence post, a stone wall, or a bend in a path. Use leading lines to draw the eye into the mist, then let a distant ridge or a lone tree provide a sense of scale. Negative space around the mist can be powerful; allow air between subject and background to emphasize isolation. Remember that color becomes reduced in fog, so look for tonal contrast, textures, and silhouettes to keep your image compelling.
When you frame, think about layers: near, middle, far. A shallow stack of fog layers can create a natural sense of depth. If you include water, shoot at a slower shutter to smooth any small ripples, or use a neutral density filter carefully to maintain mood without flattening texture.
Subject placement and leading lines
Place your subject off-center using the rule of thirds, then let the environment lead the eye toward the fog. A winding road, a fence line, or a shoreline curve can guide viewers through the scene. In heavy fog, even a small rock or a lamppost can become a hero—give it breathing room so it doesn’t vanish in mist.
Rule of thirds in fog and cloud textures
Apply the rule of thirds to place key elements where the eye expects discovery. In mist, those placements become even more important because color and contrast are muted. Look for a balance between texture in the foreground and soft tones in the background. This balance helps your foggy highland photos retain structure even when light is diffuse.
Camera settings and shooting workflow for foggy highland photos
Exposure in fog is a balance between preserving detail and maintaining mood. Start with a base exposure that keeps midtones alive, then adjust for the brightest highlights you want to retain in the mist. A slightly cool white balance often matches the blue-green cast of fog, but don’t be afraid to push warmer tones for a moodier look if the scene allows.
Workflow tips: shoot in RAW to maximize latitude, enable highlight recovery, and use a modest ISO (100–400) to keep noise low. In steady drizzle, a slower shutter (1/4–1/50s) with a tripod helps smooth textures without losing shape. If you’re chasing movement, a longer exposure can add drama to moving fog or sea spray.
For consistency, pre-set a couple of recipes for different scenes: wide landscapes with water, intimate village corners, and dramatic silhouettes against cloudy skies. And don’t forget to review your histogram to avoid clipping in the misty highlights.
To deepen your understanding of exposure in mist, explore reliable tutorials and practice in calm, sheltered locations before taking on exposed cliff edges.
Exposure and white balance in mist
In fog, the histogram can skew toward midtones. A touch of exposure compensation (+0.3 to +1.0 EV) often helps, but avoid blowing out bright patches on wet surfaces. White balance tends to lean blue; if you want a warmer mood, shift slightly toward 5200–5600K and evaluate skin tones and wood tones in your shot.
Shooting modes, bracketing, and cadence
Use RAW to preserve latitude, and consider exposure bracketing when the fog is changing rapidly. A modest three-shot bracket around the middle exposure yields options for later blending. If you’re confident in your scene, a single, well-exposed frame can work—but fog shifts quickly, so be ready to adjust and shoot frequently.
Next, Part 2—Lighting and Post-Processing for Foggy Highlands—dives into lighting strategies and post-processing workflows that elevate foggy highland photos, turning mist into an artistic signature rather than a constraint.
Step-by-step Techniques to Capture foggy highland photos for Instagram
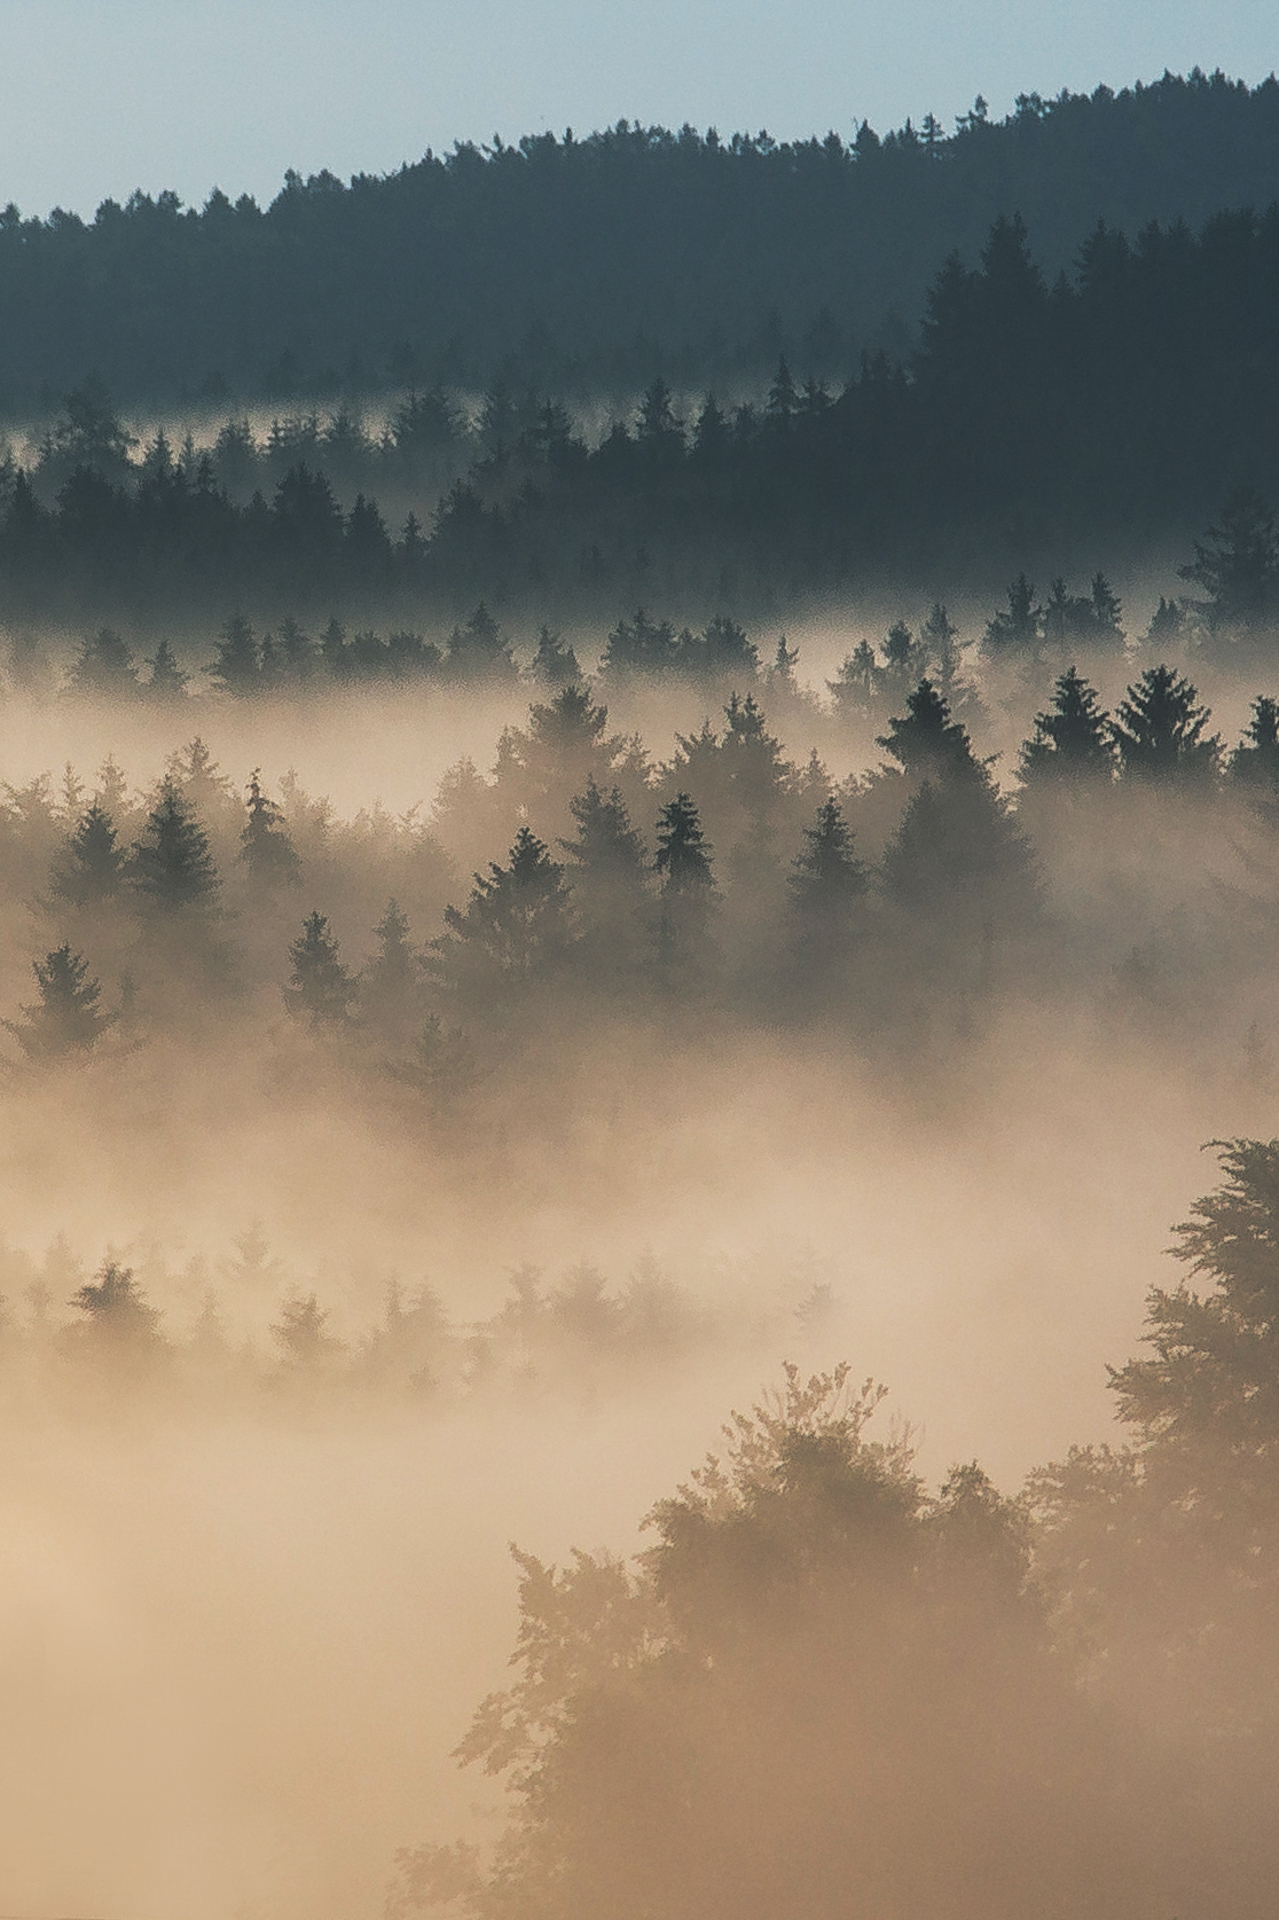
In the misty Highlands, fog can be your ally or your obstacle. The right technique turns moisture into mood and transforms ordinary drizzly days into Instagram-worthy scenes. This part provides a step-by-step guide to capturing foggy highland photos that sing on feed and in stories, with practical tips you can apply on your next RainyRoutes adventure.
Understand how fog behaves and plan your shot
Fog is a living element. It thickens or lifts with temperature shifts and wind. Your plan should hinge on timing—the early light of dawn or the blue hour often yields the softest, most cinematic fog. In practice, scout the area on a dry morning first, then return when humidity climbs. Bring a simple map or app notes to mark the silhouettes you want to include, such as a solitary tree, a crag, or a winding track that disappears into white. When you aim to capture foggy highland photos, think in layers: a distant ridge softened by mist, a mid-ground feature just coming into focus, and a foreground element to anchor depth. This layering makes the scene feel immersive and print-ready for Instagram. Remember that the fog will behave differently depending on elevation and exposure; a high valley may swallow light, while a ridge can glow with reflected dawn. If you can, time your session to coincide with clear pockets in the valley so the fog reveals those features gradually.
Weather apps and local forecasts can guide your planning, but always leave space for serendipity. Fog may roll in unpredictably, yet the best moods come from shooting during the brief windows when density is perfect. If you want deeper fog theory and practical examples, this guide explains the physics behind fog and how to anticipate it: How to photograph fog.
Gear and settings tailored for fog
Choose gear that stays reliable in damp conditions. A weather-sealed mirrorless or DSLR paired with a small, fast prime or a versatile zoom keeps options open. A sturdy tripod is essential when light slips toward the dim end of the spectrum, and a rain cover protects your camera while you wait for the right moment. For foggy highland photos, a moderate focal length—around 35mm to 85mm on full-frame—helps you embrace the scene without compressing too much or revealing every grain of mist. If you want grand, sweeping fogscapes, a wide angle works; for intimate mood, a telephoto isolates a solitary silhouette against mist. Shoot in RAW to preserve dynamic range and control white balance in post. Set exposure in manual mode with a cautious exposure compensation, because fog can trick the meter toward dull gray. A crisp histogram is worth chasing; aim for a balanced exposure where the highlights aren’t blown and the shadows retain detail. For fidelity in fog, white balance leans toward the cooler side, but you can tilt warmer to evoke mood—experiment with 3800–5200 Kelvin depending on light and the color of your surroundings. Consider lens protection: a small blower to remove dew, a microfiber cloth for glass, and anti-fog wipes for quick touch-ups between frames.
Beyond the camera body, bring spare batteries, memory cards, and a weather-resistant bag. Your kit should stay light enough to move quickly on slippery ground. If you shoot with a filter, a soft graduated filter can help balance a bright sky with a dim foreground only when you’re sure the sky will peek through the fog. Don’t forget spare batteries; fog drains power quicker in cold, damp air. For those who shoot with smartphones as a primary tool, enable RAW shooting if available and keep a steady hand with a compact tripod adapter. For inspiration, this field-tested guide explains fog photography techniques in detail: How to photograph fog.
Composition and storytelling in fog
Fog is narrative. Use leading lines—roads, fences, streams—that guide the viewer’s eye into the fog. Silhouettes—wet trees, cottages, or more modern structures—serve as anchors, creating a focal point that surprises the eye as it emerges from mist. Negative space becomes a character; the emptiness of fog invites curiosity and slows the scroll on Instagram. Look for texture in the mid-ground—stone walls, moss, or a railing that appears through the veil. A simple composition with a strong foreground interest often yields the most enigmatic foggy highland photos. When the mood asks for scale, place a person or a distant animal to emphasize the vastness of the landscape. Framing matters: a narrow gap in a hedge or a gate opening into whiteness can be a powerful portal into the scene. Experiment with diagonals—slanted fences or a winding path—to create motion even when everything else is still. The result should feel quiet and contemplative, not cluttered, and should tell a story about time, weather, and place.
In fog, color becomes a secondary character. If you can, use silhouettes against a pale sky to pull attention to form. In soft light, textures like stone, moss, and weathered wood gain narrative weight. For a classic Highland mood, frame a solitary tree on a crest line or a crumbling wall that peels into the mist. If you’re comfortable with a minimalist approach, a single prominent feature—such as a gatepost or a lone fence post—can become a potent hero in foggy highland photos.
Exposure and white balance for fog mood
Fog softens contrast; your goal is to retain mood without washing out details. Shoot in RAW to retain maximum latitude. Use exposure compensation to push highlights a touch brighter if the fog is dense and the scene looks flat. A common starting point is +0.3 to +0.7 EV for foggy landscapes, then adjust after reviewing the histogram. White balance is crucial; fog often reads blue, so 4000–5200 K can feel natural, but you may prefer cooler or warmer tones to match the scene’s emotion. If you shoot color, subtle shifts in hue can transform a grayscale mist into a warm, velvety panorama. If you aim for a more classic look, consider a monochrome workflow that preserves shape and texture while letting the fog carry the mood. When the sun breaks through, you may need to adjust again to preserve the highlight detail that fog often hides.
Additionally, keep an eye on dynamic range. Fog scenes can hide subtle tonal differences in the mist. If you notice banding or posterization in the fog area, reduce contrast slightly and rely on micro-contrast adjustments in post to preserve the sense of depth. For Instagram, a shallow grade can preserve both the feel of the fog and the texture of the ground, creating a tactile image that stands out in a crowded feed.
Focusing and depth of field for maximum mood
In fog, especially when visibility is limited, focus becomes a critical decision. Use manual focus or live view magnification to nail the focal point. A shallow depth of field can isolate a single feature and give the fog a painterly blur, while a deeper depth preserves context and scale. A general approach is to set focus roughly one-third into the scene and then adjust with live view until you feel the elements align. If you want crisp tree textures in the foreground, pick a smaller aperture (f/8–f/11) and compensate with a longer exposure if necessary. Conversely, a wider aperture (f/4–f/5.6) can render a soft, dreamlike fog, particularly with backlight or side light that slices through the mist. If your equipment allows focus peaking, enable it to verify that your foreground, mid-ground, and background align with your intended depth cues.
When photographing people or animals within fog, ensure your subject remains sharp while the environment softly glows around them. A mid-range focal length helps you balance subject presence with the surrounding fog. If you’re using a telephoto, you can compress distance and emphasise the density of the mist, creating an intimate, moody portrait among the moors. Always review a few frames at 100% on the LCD or EVF to confirm texture in the fog and the clarity of key elements.
Bracketing, panoramas, and HDR for foggy scenes
Since fog can drain dynamic range, bracketing exposure—capturing several frames at different exposures—helps preserve detail in both highlights and shadows. If you shoot panoramas, ensure your stitching overlaps enough to maintain mist continuity. HDR processing can bring out texture in the fog and reveal the shapes of distant features, but resist pushing HDR too far; you want realism with atmosphere, not a cartoonish glow. For handheld work, use a moderate exposure variation and keep your tripod in place to align more accurately. When the wind shifts, step back to recompose; fog is a moving canvas, and slight changes can alter the mood dramatically. If you’re stitching across a long horizontal, shoot in portrait orientation for Instagram and then crop to 4:5 or 1:1 later, so you preserve the path of the fog as it moves through the frame.
Color grading and finishing touches for foggy highland photos
On the day you shoot, plan a basic on-device workflow. Even if you stay with JPEG for quick Instagram-ready posts, you still want consistency in color. In post, adjust contrast minimally; fog often benefits from a gentle lift to midtones to recover texture. Subtle desaturation or a controlled color grade can evoke mood—cool blues, muted greens, or warm ochre tones for a hint of dawn. A light local adjustment on key areas, such as a distant cottage or a fence line, can bring life without overdriving the mist. If you prefer a timeless look, a black-and-white conversion emphasizes shape and texture, turning fog into a sculptural instrument. The aim is to preserve the quiet drama of foggy highland photos while keeping a natural, Instagram-friendly balance. For Instagram, consider a batch approach: apply the same tonal curve across a series taken in similar fog conditions to keep your feed cohesive.
In addition, simple stylistic choices can unify your foggy highland photos as a collection. A gentle vignette can ground the eye in hazy light, while a soft gradient helps reintroduce depth where fog flattens the scene. When you want a modern, cinematic feel, try a warm highlight lift on the sunlit edge of the fog and a cooler cast in the shadows to create a three-dimensional presence even in low-contrast moments.
On-site workflow for maximum efficiency
When you’re chasing fog, efficiency matters. Keep a compact kit that’s weather ready and easy to carry across slick stone paths. Pre-plan your shot list, but stay flexible to catch last-minute changes in fog density. Mount the camera on a lightweight tripod for long-exposure fog scenes or hand-hold for quick silhouettes when the mist thins. Create a brutal but simple evaluation routine: check your histogram, verify focus, and review the scene in real time on your display. Pack extra batteries and a microfiber cloth to wipe moisture from lenses between frames. Remember to respect nature, especially in protected Highland areas; stay on marked paths to protect both the moss and your equipment. Before you head back, download the best frames to your phone for a quick edit, so you can post while the mood is still fresh in your memory.
Safety, weather, and comfort tips
Fog and rain create a slippery playground. Wear waterproof layers and sturdy boots with good grip. Gloves should allow sensor button access if you frequently adjust settings. A compact rain cover is worth it for your camera, but don’t let it mute your senses; stay aware of changing weather and wind shifts. In remote highland locations, keep a small LED light for early dawn shots when you’re negotiating uneven ground. If visibility drops suddenly, back away gradually to the safest path and avoid high-risk risk zones. Your safety is paramount; the fog will still be there when you return, but you can’t replace yourself. Carry a phone with emergency contact numbers saved and share your plan with a friend before trekking into fog-laden ridges. Have a backup plan for indoor options if a storm moves in— a local cafe or a covered viewpoint can still yield evocative fog photography with reflections on glass.
Preparing image outputs for Instagram
Instagram thrives on vertical space and clear composition. When you crop to 4:5 or 1:1, maintain the essential mood you worked for in the fog. Sharpen only as needed, and apply subtle noise reduction if the fog adds texture noise at higher ISO. If you shoot RAW, export a web-friendly JPEG with a balanced sharpening and a slight boost to midtones to maintain readability on small screens. Include an evocative caption that complements the mood—short, reflective lines or a quirky weather observation can invite engagement. Hashtags should be purposeful and not overpower the image; a handful of high-intent tags can outperform broad, generic tags for foggy highland photos.
In all cases, practice makes memory. The Highlands reveal their mood most clearly when you learn to listen to the fog rather than forcing it. The approach you take with foggy highland photos should feel patient, deliberate, and inherently adventurous, aligning with the mystic, mist-charmed vibe that RainyRoutes champions.
Next, Part 3 dives into post-processing foggy highland photos for Instagram, where we explore editing workflows, color grading, and caption strategies to maximize engagement and reach.
Advanced Foggy Highland Photo Strategies for Instagram and Beyond
As we reach the final section of Foggy Highland Photography, the focus shifts from technique to mastery. In 2026, fog-heavy aesthetics continue to resonate on Instagram and across visual platforms. The goal here is to elevate your practice with deliberate methods that translate the mystical mood of misty Highlands into consistently compelling imagery. You will learn to refine composition, leverage light, optimize gear for wet weather, and apply processing that preserves mood without sacrificing detail. Ultimately, these strategies help you create foggy highland photos that stand out while remaining authentic to the environment.
Refined Composition for foggy highland photos
Composition is the backbone of dramatic fog photography. When fog envelops the landscape, depth becomes your strongest ally. Use multiple layers: a distant silhouette, a middle ground of rolling hills, and a foreground object such as a weathered fence, rock, or a puddle that mirrors the scene. Place interest along the rule of thirds, but don’t hesitate to break it when fog creates a strong central axis. In fog-rich scenes, negative space can convey solitude and vastness. Let the mist guide the viewer through the frame, leading their eye along quiet slopes and converging lines.
Try foreground frames with windows, doorways, or archways that frame your subject and the fog beyond. Reflections in damp surfaces add symmetry and texture. If you shoot with a wide lens, exaggerate the sense of scale by including a distant foreground anchor. If you use a telephoto, compress the layers to heighten the mood and isolate fog-filled planes. Always test vertical and horizontal compositions to reveal how fog reshapes perspective.
In post, maintain the integrity of your original frame. Avoid overcropping, which can flatten the sense of place. The most powerful foggy highland photos preserve a tangible sense of place — the mossy hillside, a loch, a ruined shelter, a heather field — while letting fog wash over the edges for atmosphere.
Lighting, Weather Timing, and mood for foggy highland photos
Fog creates its own light narrative. In the Highlands, gold and blue hours acquire new texture as mist swirls. Plan shoots around times when fog densifies or lifts, and be ready to adapt quickly. Low sun can punch through gaps in the fog and cast long, soft shadows that carve depth. Cloudy days intensify the diffuse light, reducing harsh highlights and enhancing color nuance in moss, peat, and stone.
Exposure control is critical. Use exposure compensation to avoid losing detail in bright fog halos or dark silhouettes. A slight underexposure can deepen the mood, but avoid crushing shadows; you still want texture in tree limbs and rock. Bracket exposures when possible, then blend to retain highlight detail and preserve the sense of an air-filled scene. White balance often benefits from a cooler palette to emphasize the damp, ultramarine tones of fog, but adjust to preserve natural skin tones if people are present.
Ultimately, the weather dictates your timing. If the fog thickens suddenly, you may need to switch to faster shutter speeds to freeze moving mist or mist-laden spray near shores. If the fog lingers, you can experiment with longer exposures for a satin-smooth surface on water or dew-laden grasses. In all cases, maintain a fast shooting rhythm to capture fleeting silhouettes or changing fog density.
Gear and settings for reliability in wet conditions
Weatherproofing is non-negotiable for foggy highland photography. Use a weather-sealed camera body and lens with a reliable rain cover or micro-fiber sleeve to keep the lens elements clean. A sturdy tripod is essential for long exposures in damp mornings and blue-hour shoots where every millisecond counts for sharp focus and balanced exposure. Carry extra batteries and memory cards in a dry pouch, since cold, damp air drains power faster than you’d expect.
Settings matter more in fog than you might think. Shoot in RAW to preserve the fine gradations of gray and color that fog imparts. Start at aperture f/5.6 to f/8 for a balanced depth of field that keeps foreground textures crisp while preserving distant fog layers. ISO should stay low to minimize grain, except in low-light blue-hour moments where a slight bump may be necessary. Use manual focus with focus peaking to ensure critical sharpness on textured surfaces. If your lens supports it, enable focus breathing correction to maintain composition as fog shifts. Bracketing is valuable for challenging scenes with a wide dynamic range; merge exposures in post to recover detail in both highlights and shadows.
Consider anti-fog or anti-static lens wipes for longer shoots, and a microfibre cloth to clear condensation without scratching coatings. If you must move, keep the camera close to your body to avoid fog or rain on the viewfinder. For movement-rich scenes like wind-driven grasses, a higher shutter speed can freeze motion for a crisp contrast against soft fog.
Color tone and mood: post-processing for foggy highland photos
Post-processing is where fog photography reaches its full potential. Start with white balance that leans slightly toward cool to emphasize mist and moisture, while preserving the greens of moss and heather. Use a gentle contrast lift to separate fog from terrain without creating harsh edges. Texture and clarity controls can be dialed back to preserve the delicate, velvety feel of fog, but do not flatten the scene. Subtle structure adjustments help bring out stone textures without making them appear harsh in the mist.
Color grading should honor natural hues: cool blues and teals for foggy regions, with earth tones kept intact to reflect the Highlands’ rugged beauty. Consider split-toning to separate shadows and highlights with a cool tone on the shadows and a warmer glow on lights and reflections, if present. If you shoot color-banded skies or dusky horizons, apply gentle gradient masks to ensure a smooth blend between sky, fog, and landscape. Avoid over-saturation, which often undermines mood in fog photography.
For consistency across a series, keep a deliberate, repeatable workflow: white balance first, then exposure adjustments, followed by tone and color grading, and finally sharpening and noise reduction. Non-destructive editing with adjustment layers helps you maintain flexibility. If you create a signature look, label it in your metadata for future prompts and searchability.
Focus techniques and motion effects in fog
Depth control is critical when fog blurs distances. Manual focus often yields the most reliable results because autofocus can hunt in low contrast. Switch to live view magnification when possible to nail focus precisely on the closest focal plane. Use focus stacking for scenes with near and far elements that require different focus distances; this is particularly effective on stone walls or grassy foregrounds fed by mist.
Motion can become a powerful storytelling device. A long exposure of a water body or grasses can create a silk-like surface that contrasts with crisp rock textures. If you opt for motion, keep your tripod steady and use a remote release or self-timer to avoid camera shake. Conversely, a short exposure can freeze lone droplets in the air, adding a sense of momentary clarity within a broader veil.
Framing, perspective, and a cohesive Instagram series
For Instagram and beyond, you’ll want a cohesive visual language. Vary your framing while maintaining a consistent mood: wide landscapes, mid-range vignettes, and intimate details like mossy textures or frost on fences. Perspective changes — kneeling, kneeling with a low vantage, or elevated viewpoints — reveal different fog dynamics and help you assemble a storytelling sequence. Create a series around a single location over a morning or dusk period to document fog’s evolution, from dense layers to thinning mist.
Vertical compositions can emphasize height and scale, while horizontals spotlight horizon lines and the sense of vastness. Include recurring motifs such as stone walls, wooden gates, or reflective pools to anchor your audience as the fog shifts. If you publish a multi-post carousel, arrange the frames to guide the viewer through a logical progression: foreground intrigue, middle distance, distant silhouette, and fog-draped conclusion.
Post-processing workflow for consistency and speed
Develop a streamlined, repeatable workflow. Start with a base adjustment: white balance, exposure, and contrast to recover detail in fog and rock surfaces. Apply a gentle dehaze that enhances texture without introducing halo artifacts. Use selective adjustments to recover misted highlights around bright reflections and to deepen shadows where the fog sits densest. Save this look as a custom preset or a LUT-style recipe to keep tonal consistency across a shoot.
Organize your files by location, time, and mood so you can quickly retrieve the exact look you’ve planned for a foggy Highlands sequence. When publishing, keep a consistent aspect ratio and caption structure to foster recognizability. If you share on multiple platforms, adapt the same edit to preserve the mood across formats while respecting each platform’s color space and compression.
Captions, hashtags, and SEO for foggy highland photos
Captions should augment mood, not merely describe. Tell a short narrative about the moment: the smell of rain, the crunch of gravel, the hush of the Highlands as fog closes in. Include a few key details like location, time, and weather, then invite engagement with a question. When optimizing for search and discoverability, use the exact focus keyword naturally within the caption and as image alt text. Name your image files with descriptive, keyword-rich phrases such as foggy-highland-photos-location-date.jpg and avoid generic names.
Hashtags remain useful but should be targeted and specific. Use a handful of broad tags alongside nichier phrases that mirror your foggy highland photos’ character. For example, pair #FoggyHighland photos with #HighlandMist, #RainyRoutes, or #MysticOutlands to reach readers interested in mood-driven travel photography. For accessibility and SEO, provide a descriptive alt attribute for every image: include the focus keyword and a succinct description of what’s in the frame. To keep a credible, non-spam tone, avoid stuffing hashtags or keywords.
For readers who want practical tools, consider a curated resource hub in your blog post that links to editing tutorials and color-grading references. For example, Adobe Photography resources offer a solid baseline for managing color, tone, and workflow across foggy highland photos.
Safety, ethics, and Leave No Trace in foggy Highlands
Highland environments demand respect. Fog can conceal hazards such as unstable ground, sudden drops, and slippery rock. Always plan your routes with weather alerts and local guidance. Let others know your itinerary, carry a basic first-aid kit, and keep to established trails whenever possible. Respect private properties and respect wildlife by keeping a safe distance. The mood of fog is transient; your responsibility is to preserve the landscape for others who will follow.
Ethical photography means prioritizing safety over a perfect shot. If conditions deteriorate, retreat to a sheltered spot and wait for fog to shift rather than forcing a risky sequence. In the long run, responsible practices protect the foggy Highlands as a muse for future photographers and travelers.
Conclusion
Advanced foggy Highland photo strategies empower you to capture the Highland’s misty theater with precision and soul. By refining composition, mastering light and timing, equipping wisely for wet weather, and applying consistent, mood-faithful processing, you can create foggy highland photos that enchant viewers and invite them into the scene. Remember to balance technical excellence with storytelling — each image should speak of place, weather, and mood rather than merely showcase gear.
Ultimately, your audience will come back for the atmosphere you cultivate: quiet majesty, the drama of fog, and the sense that the Highlands are at once intimate and boundless. To begin your continued journey, subscribe to RainyRoutes for ongoing inspiration, gear reviews, and field-tested workflows designed for rain-soaked adventures. In summary, your path to memorable foggy highland photos is built on deliberate technique, thoughtful composition, and a reverence for the mist-wrapped world you’re documenting. To conclude, embrace the fog, honor the landscape, and share your best foggy highland photos with a grateful, curious audience.